GitLab Auth
Before creating your container, you'll need to create a GitLab app for your organisation.
Creating a GitLab app
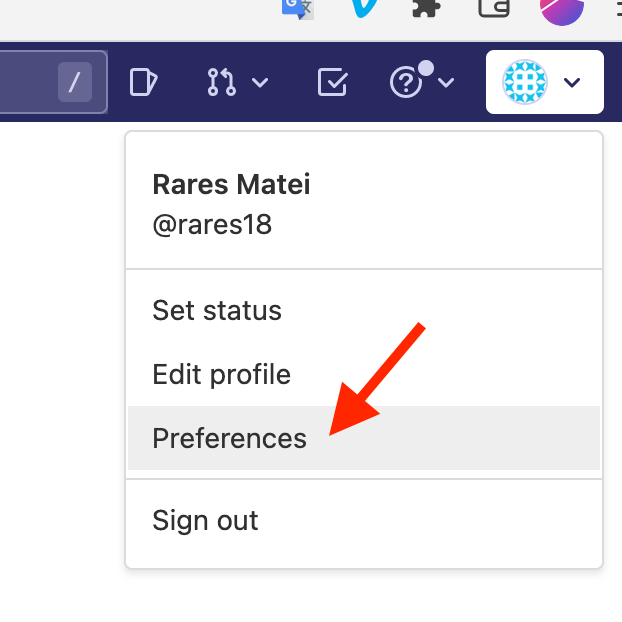
From GitLab, click on your profile picture and chose "Preferences":
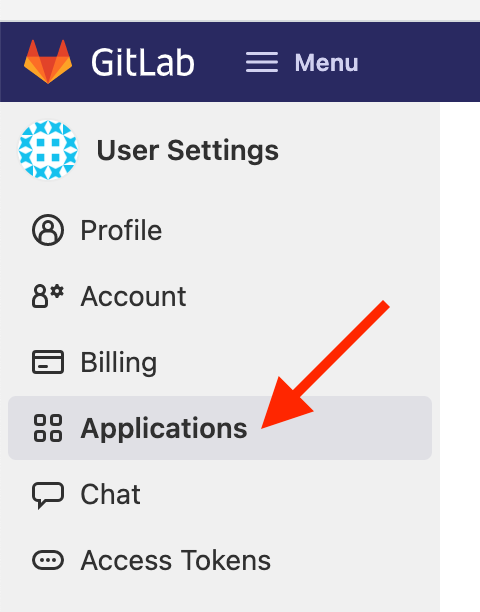
Then "Applications" from the left-hand menu:
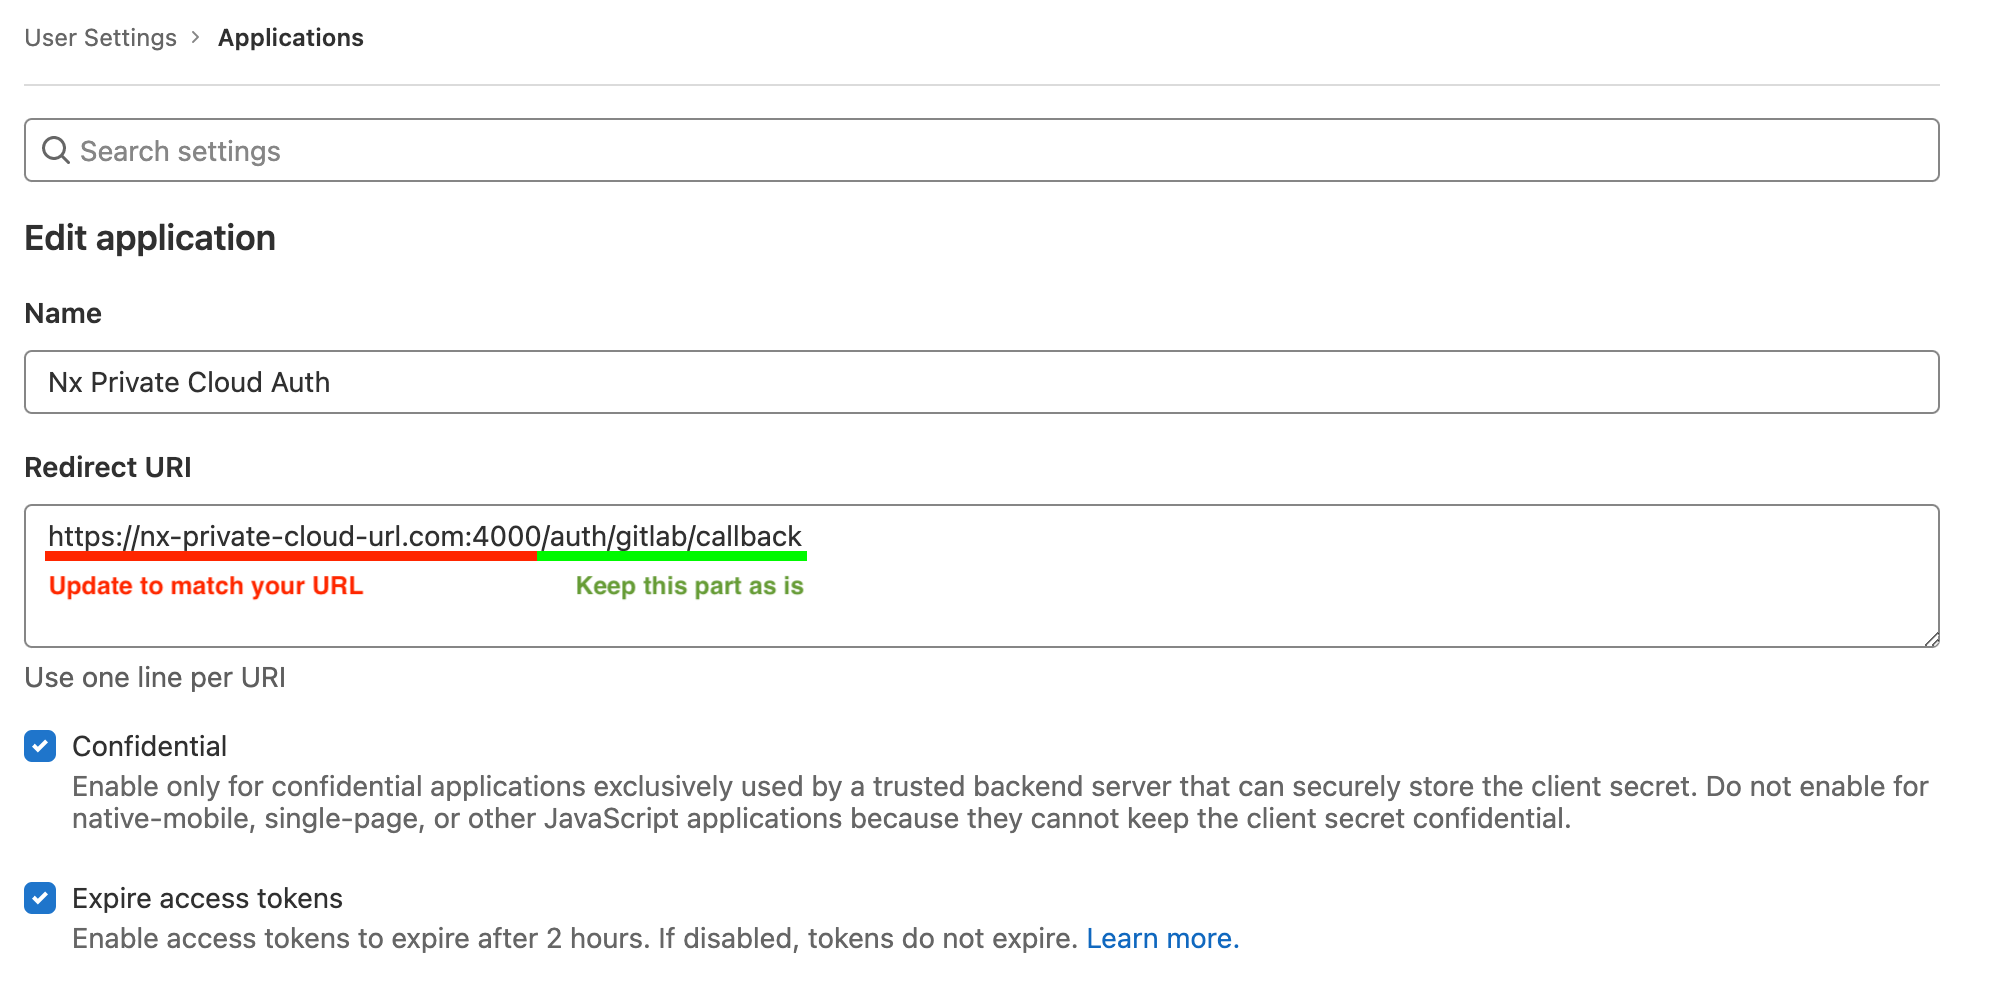
Give the app a name. The authorization callback is the important bit. It needs to be in this form:
[your-nx-cloud-url]/auth/gitlab/callback
Important: Ensure there is no backslash at the end of the "Redirect URI" (i.e. it matches the above pattern)
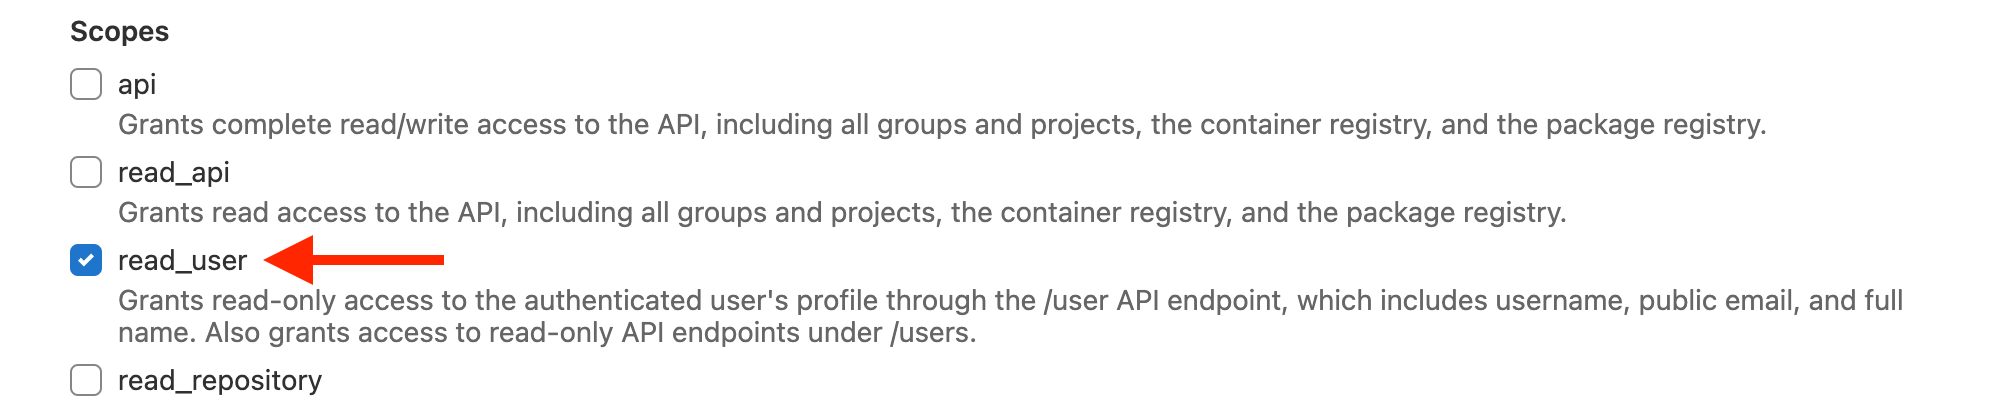
Ensure you grant it the "read_user" scope:
Click "Save".
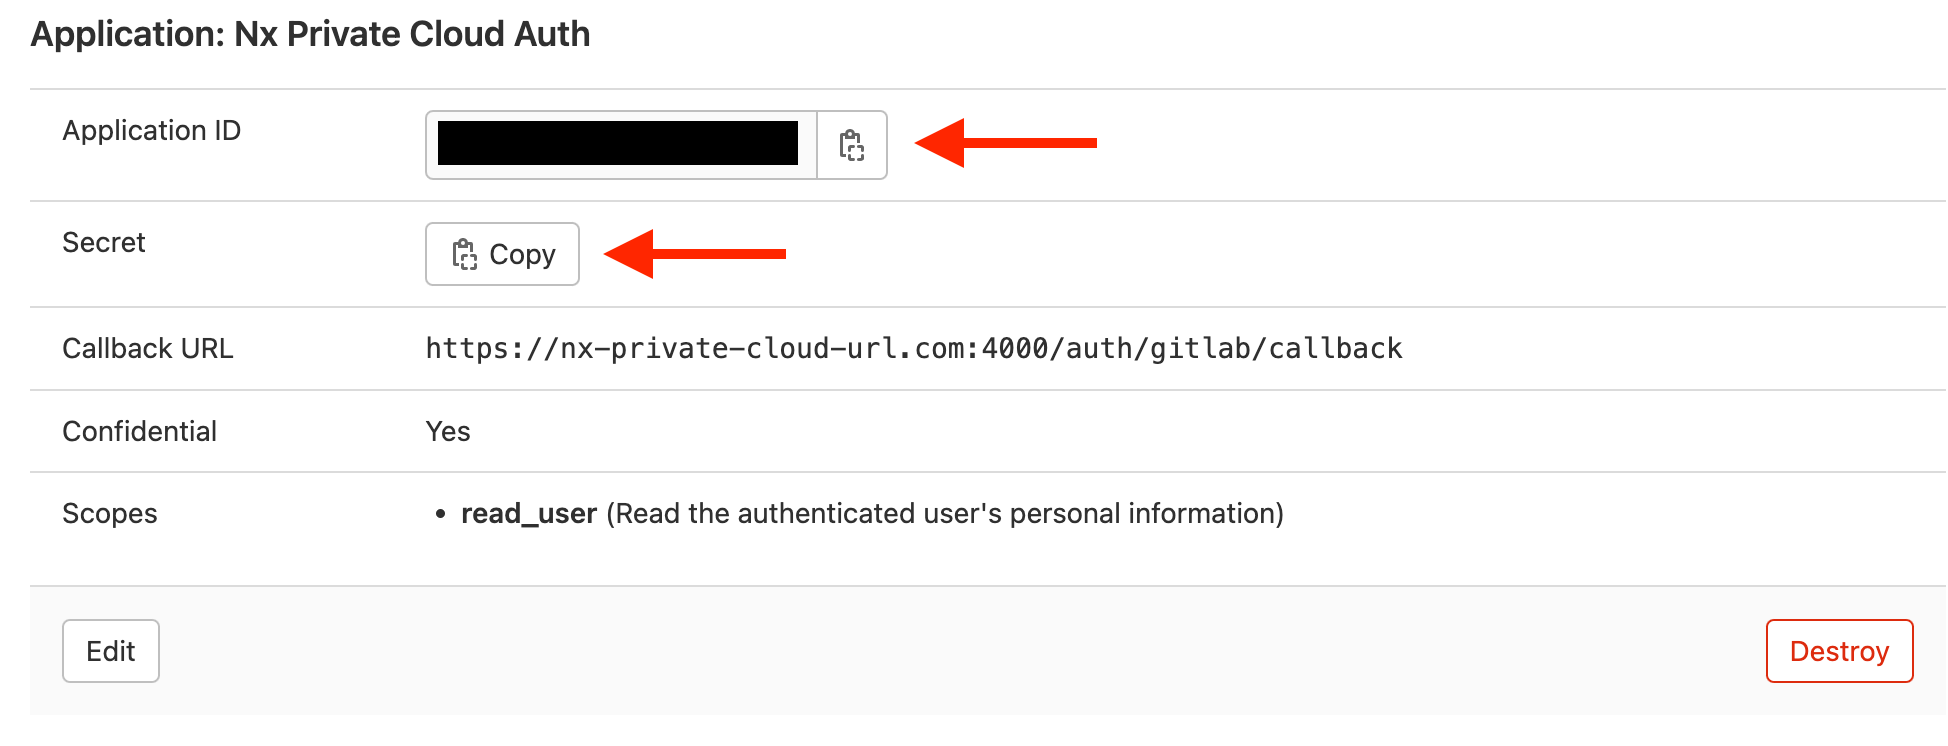
Once you create, keep a note of the Client ID and the Secret:
Connect your Nx Cloud installation to your new app
Provide the following env variables to the nx-cloud-api container:
GITLAB_APP_IDGITLAB_APP_SECRET
On-premise GitLab
If you are running an on-premise version of GitLab, you will need to configure one additional environment variable:
GITLAB_API_URL=https://custom-gitlab-instance.com
This will point all the auth endpoints to your GitLab server (rather the public one).